Proc++
Erik Dietrich, Marios Nicolaides
1. Overview
For this project, we set out to create an extended, user friendly version of the Linux “proc” pseudo-file system. Our initial version displays Java-based user interface that is similar in appearance to the Windows process manager. It has the usability advantage of being intuitive to anyone who is familiar with that tool.
However, unlike the Windows process manager, Proc++ allows the user to double click on a process and obtain a great deal of specific, detailed information about it. Some of it is technical information that may appeal to power users and programmers (page faults, context switches, etc), while some is information that anyone might find interesting, such as the filename and directory of the executing process. In addition to displaying this information, Proc++ also gives the users the option to kill the process, ala Windows process manager, but also the ability to pause or resume the process.
The other major feature of Proc++ is that it can be configured to work on a local machine or remotely. If properly set up, a user can run the GUI client on a local windows machine, setup the daemon on Linux server, and view/manage the server’s processes remotely.
2. Socket Communication Specs
The Proc++ UI communicates with the Proc++ system daemon using sockets. The socket approach has the advantage of communication across languages (Java and C for our purposes, but extensible to other client languages) as well as across machines. That is, in theory, the UI can reside on a remote machine and jack into the daemon on a “server” or target machine.
In order to make use of socket communication, we devised a simple protocol for communication. We did not implement security or encryption, though adding these would not be difficult for a future developer. We did implement a simple session-based protocol where the server is capable of supporting multiple clients. This was done to allow for some flexibility, though at the moment, each client only requests a single socket while active (though we do allow multiple client instances to run).
On a high level, the UI client connects to the daemon and maintains its connection for the duration of its use. When the UI is closed, it sends the server a message to alert the server that it is done. It then closes the socket.
Here is a detailed description of the protocol:
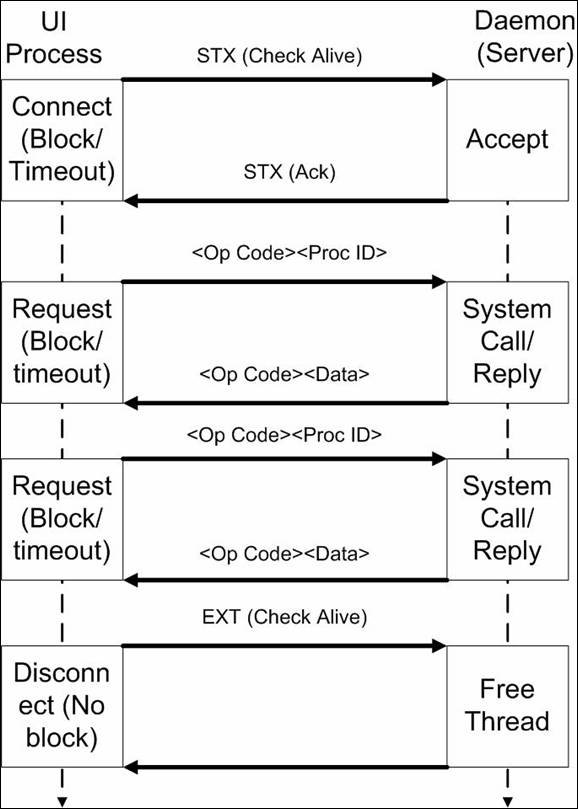
Figure 1 – Protocol
As shown here, the client requests take the format <Op Code><Proc ID> where <Op Code> is a single character and <Proc ID> is a five character representation of the process ID integer. The server responses take the format of <Op Code><Data> where <Op Code> is the same character from the client request and <Data> is the data requested. There is no field for size of <Data> as this will be determined by the op code itself. It is not strictly necessary for the server to reply with <Op Code>, but we felt that this would be no extra work and would help make the protocol more extensible in case we later decided to make it asynchronous.
An additional consideration is that a message from the daemon of <OpCode><Nulls> is designed to signal the GUI that the process it requested information about is no longer running, so that the GUI can notify the user.
Here are the op-code definitions:
|
Op
Code |
Argument(s) |
Response
Size |
Return
Type |
Function
Name |
|
5 |
int |
9 |
long |
get_user_time |
|
6 |
int |
9 |
long |
get_system_time |
|
7 |
int |
9 |
long |
get_page_reclaims |
|
8 |
int |
9 |
long |
get_page_faults |
|
9 |
int |
9 |
long |
get_voluntary_ctx_switches |
|
10 |
int |
9 |
long |
get_involuntary_ctx_switches |
|
11 |
int |
9 |
long |
get_messages_sent |
|
12 |
int |
9 |
long |
get_messages_received |
|
13 |
int |
9 |
long |
get_device_id |
|
14 |
int |
9 |
long |
get_inode_number |
|
15 |
int |
9 |
long |
get_user_id |
|
16 |
int |
9 |
long |
get_group_id |
|
17 |
int |
9 |
long |
get_size |
|
18 |
int |
9 |
string |
get_process_owner |
|
19 |
int |
9 |
Long |
get_process_time |
|
20 |
int |
9 |
long |
get_cpu_usage |
|
21 |
int |
9 |
long |
get_mem_usage |
|
22 |
int |
9 |
long |
get_priority |
|
23 |
int |
1 |
char |
suspend |
|
24 |
int |
1 |
char |
resume |
|
25 |
int |
1 |
char |
kill |
|
26 |
Int (0) |
Variable |
string |
top |
For the time being these are hard-coded into both client and server, but we may abstract them out to a configurable text file.
3. Deployment/Deliverables
Given the fact that the GUI and daemon can exist on different machines, the deployment is separated into two obvious categories: daemon and GUI.
3.1 Daemon
Deploying the daemon is simple. It is distributed as a compiled executable binary, so a Linux user can simply run it from the command line (or through the desktop). It is up to the user if he wants to schedule it to run on startup and if he wants to configure iptables/firewall to allow access from remote GUI clients. As a note of warning, there is no encryption of messages or verification of client authenticity. As of the time of writing this, a malicious client could send a message to terminate a process and the daemon would comply.
3.2 GUI
The GUI is distributed as a runnable jar in the root directory of the deployment and a comm configuration file in a sub-directory called “config”. The comm. configuration file is simply a text file with the format: <hostname>,<port number>. This tells the GUI where to look in order to find the daemon.
4. Operation
To use the GUI for Proc++, it is first required that the comm. file be in the config subdirectory. If that directory or the comm. file is missing, an error message will occur:
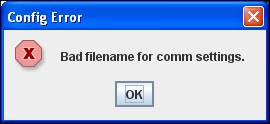
Figure 2 - Missing Comm Configuration File
If the file is present, but badly formatted, the following error message will occur:

Figure 3 - Badly formatted comm settings file.
Finally, a properly formatted comm. file will yield the following if the daemon is not listening on the hostname and port number you have entered:

Figure 4 - Good comm file, but no daemon connection
With all of the setup overhead issues eliminated, the main window should load. This is a relatively straightforward window that lists the processes along with their pid’s and how much memory they are using. This is done by requesting a modified “top” from the daemon and parsing the results. At the top of the window, the user can see, at a glance, how much memory, disk space, and processing clock speed exists on the computer hosting the daemon. At the bottom are options to refresh or close:
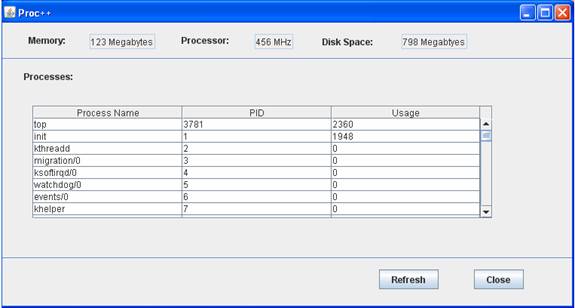
Figure 5 - Main Window
From this screen, the user can select any displayed process by double clicking it. If the process selected by the user happens not to be running any longer, the following error message will be displayed:

Figure 6 - Invalid Process
Otherwise, this window will be displayed:

Figure 7 - Child Process Window
From here, the user has several tabs of details from which he can review information about the process. At the bottom, he has access to actions allowing him to pause, resume, or kill the process. Upon selecting one of these, the GUI sends a command message to the daemon which executes the requested process. The daemon then returns a message indicating whether this succeeded or not. The following messages indicate failure and success respectively:
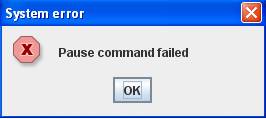
Figure 8 - Unsuccessful Command
Figure 9 - Successful Command